Module guide: On date&time Trigger

Choose the appropriate time your action path runs
What does it do?
When you go with a On date & time Trigger, you need a particular action to happen on a specific day and time. Let’s say you want to send a follow-up email campaign that starts with a newsletter and is followed by an email with a quick survey. So, whoever has subscribed to your newsletter will receive the first email then, 24 hours later, another one with a kind request for feedback.
Drag On date & time Trigger and decide when the action needs to take place. Remember that the action path will start for all of your users in the User.com database. It basically means that unless you apply any kind of conditions (Filters work in this module), the message will be sent to all of them. So, don’t get scared if you see in statistics that the action has been fired for all your users. It doesn’t mean that all of them got the message!
How to use it
When you click "Configure", you can decide on the time. Then, choose the timezone. (You can have one set up in your profile, but you can choose another one as the base time for the action path.) You can also set the entire action to be repeated (choose how often). And of course, as mentioned before, you can set up Filters inside this module to specify which users the automation will be applied to.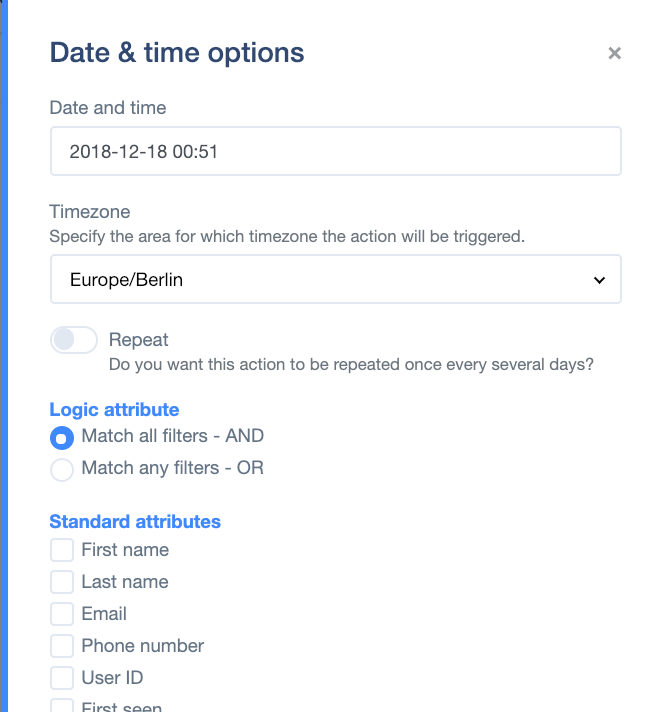
Case Study
Send a newsletter to your users, followed by another email with a kind request for feedback. What do you need to do?
Start with On date & time Trigger. Click "Configure" and scroll down to get to Filters: Email: any. So, this way, you will contact every person whose email address you’ve got in the database. Time for Action: Send an email campaign (for example “June newsletter”). Then, drag Delay and connect it to Filters. When you choose 24 hours, the time on the module will be displayed in seconds.
All done? Great. Connect Delay to another Action module: Send an email campaign (“June newsletter feedback”). Additionally, you can go on to the “on click” option; when a person clicks the link inside the email, he or she will be sent directly to your page with a feedback form. Simply add Show a form to the last module. You can also display a chat message (Action: Send a chat message):
“Hi ! Thanks for taking the time and sharing your opinion about our product.”
