Send emails using your own domain
Set up your domain in 2 simple steps
We provide an SMTP server and take care of all email sending settings. All you need to do is let us send emails using your domain. The configuration consists of two steps: adding records in your DNS and setting up the User.com app.
DNS settings
These settings let you send emails from your domain. To make it work, you need to allow User.com to send emails on your behalf. To do this, add two records to your DNS.
Please remember that settings can be different depending on your host.
Every record has its type, name, and value.
SPF record
Name: It depends on the host. In most cases, it's the name of your domain, e.g. example.com.
SPF should always be added as a TXT record.
Value: "v=spf1 mx a include:_spf.mail03-userengage.com ~all"
It is almost certain that your domain would already have existing SPF record with some default parameters. In such case you would need to edit its value by adding only this part: "include:_spf.mail03-userengage.com". See the example below.
Current value:
"v=spf1 mx a include:_spf.google.com ~all"
New value with User.com included:
"v=spf1 mx a include:_spf.google.com include:_spf.mail03-userengage.com ~all"
And if your hosting provider has a SPF record builder you can modify only this part by adding new "include" element:

DKIM record
Name: userengage._domainkey.yourdomain.com
Type: CNAME
Value: userengage._domainkey.mail03-userengage.com
“yourdomain.com” should be replaced with your domain name.
If your hosting provider uses DirectAdmin as a management panel, you need to add a period ( . ) at the end of the value input, as shown in the example above. If you're not sure about this check your provider knowledge base or contact their support directly.
DMARC record
Name : _dmarc.yourdomain.com
Type: CNAME
Value: _dmarc.mail03-userengage.com
“yourdomain.com” should be replaced with your domain name.
As in the previous example, you may need to add a period at the end of the record value. If you have any doubts check your hosting provider knowledge base or contact their support.
How to check your DNS records value
Update of DNS settings takes time due to the propagation period. You can check your current records value using Google Dig or any similar DNS lookup tool.

In the provided example, we can see that the DKIM record returns the correct value.
Missing period at the end of the value field
If your value check returns something like this:
It's a sign that you need to add a period at the end of the value, as mentioned before, because the value (target) contains your domain name which was added by your hosting panel automatically. The correct final value should contain only "userengage._domainkey.mail03-userengage.com".
Warning
After adding the domain and making changes in your DNS settings, we recommend you send a test email and check if SPF and DKIM pass. (Otherwise, your emails may be filtered as spam.) DNS changes may take some time to run.
Domain on Cloudflare
The domain name in Cloudflare is removed automatically. Therefore, the DKIM and DMARC records will look like that:
DKIM:

DMARC:

User.com settings
Go to Settings -> Email domains and choose "Add new domain".


Fill in the fields:
Name - the main name displayed on the list of domains
Domain - the domain you want to use
Description - a short description of your domain

In the next step, validate SPF and CNAME. Validating SPF is needed for sending emails. CNAME is useful for verifying messages with an anti-spam system. We recommend setting DMARC as well.

Domain sender settings
We can add several senders from one domain. In the field, Senders list, select the domain our sender will belong to.

Now we can go ahead and Create Sender

Emails settings - the domain that we would like to create a new sender for
Name - the name of the sender, e.g. Customer Support, which will be displayed on our list of senders
Sender name - the name of the sender, which will be displayed in the user's inbox
From email - displays, for the user, the email address the message comes from
Reply to - the email address your users can respond to
Description - a short description, e.g. what kind of message should be sent from this sender
How to check if the custom domain is configured correctly
The easiest way to check if the custom domain is configured correctly and records are valid is by sending a test email.
In "Settings" -> Email domains, click on the icon under Actions to get a drop-down menu. Choose the second option Send test email.

Enter the email address you want to send a test email to.

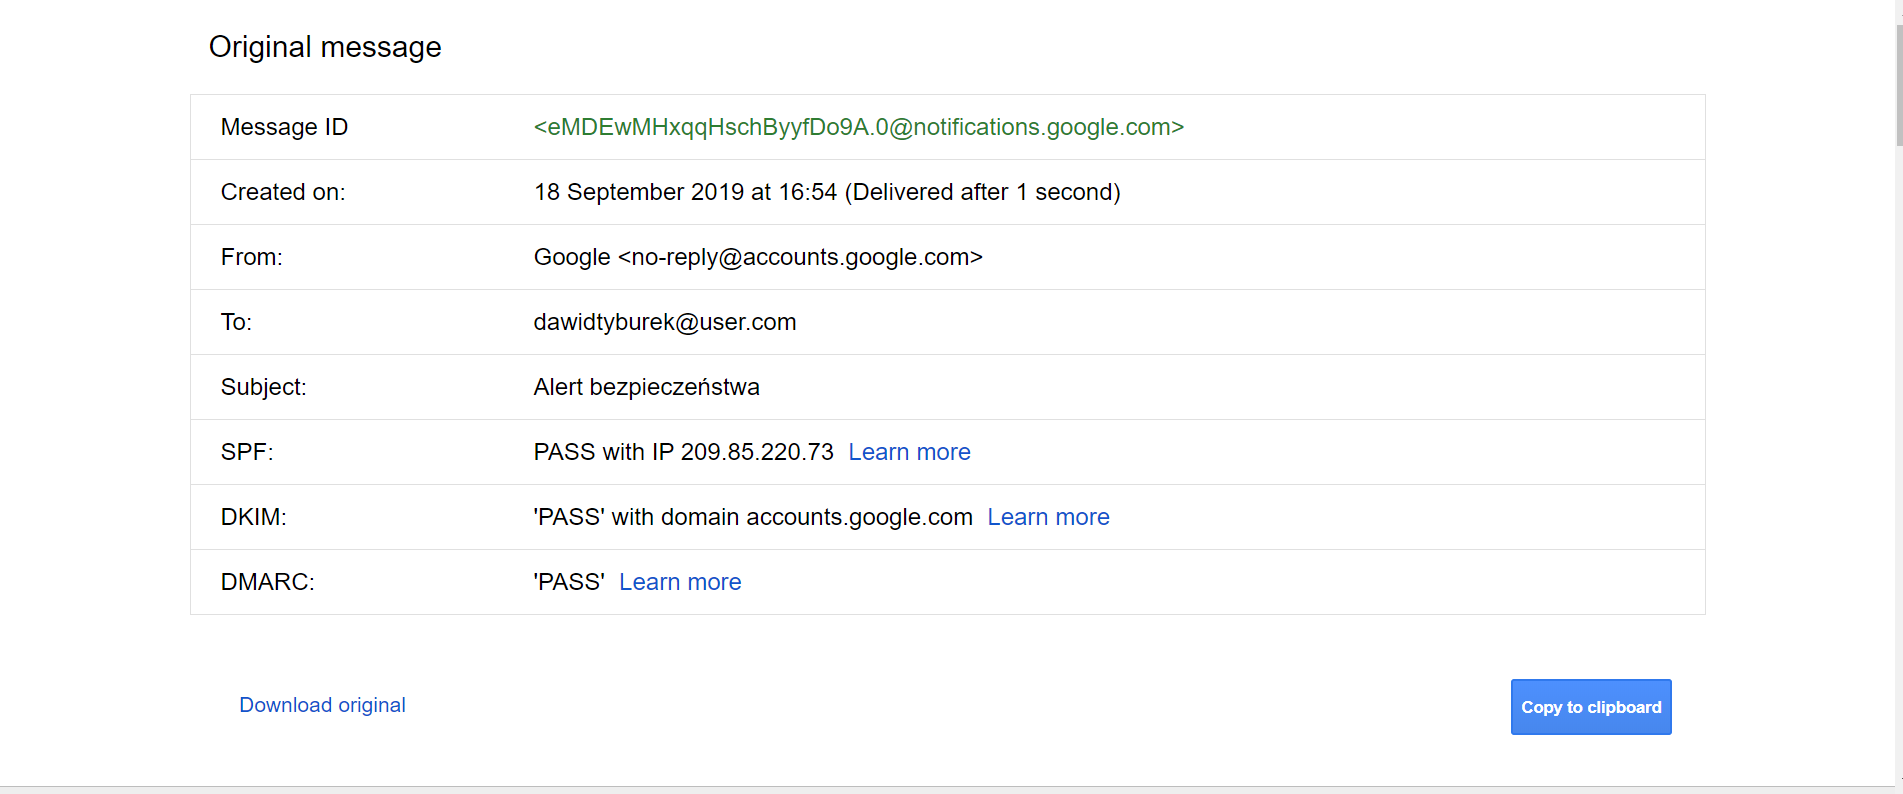
After receiving the message, check the parameters.
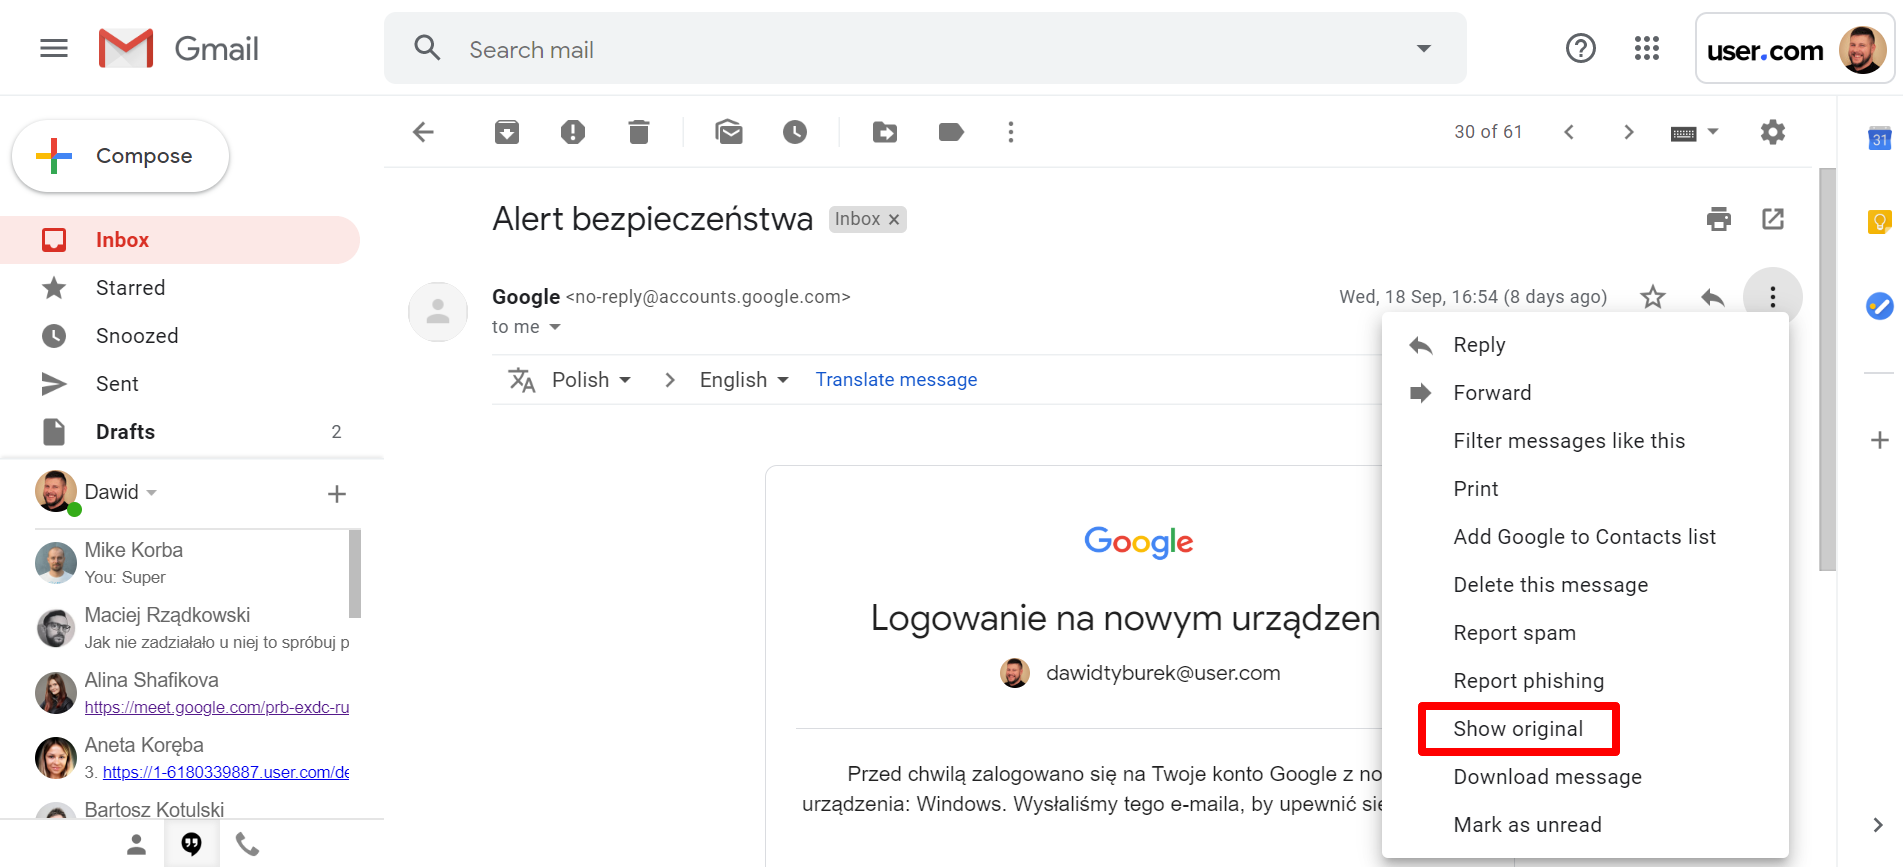
Below, you can see an example of a Gmail inbox.
When you open the message in the inbox, click the 3 dots icon on the right and choose Show original.

Check for the status, PASS, in both lines SPF and DKIM.

If there is no "PASS" in one of the parameters:
1. If there is "FAIL" in SPF( or in both SPF and DKIM), please check your records in your DNS settings.
2. If in you have "PASS" in SPF but "FAIL" in DKIM, please contact User.com Customer Support via chat. Our agents will assist you; it may be related to custom settings for each user.
How to choose the sender/domain when sending email campaigns
In the 3rd step of creating the campaign, choose which domain and sender you want the campaign to originate from.


Why is it important to send emails from your domain?
It influences spam filters, open and click rates, and increases the level of trust from your users.
Using the custom domain setting will positively affect the open rates of your campaigns, just as working with User.com will yield higher results.

