What is an event

Find out what events are and how you can send them to User.com
Definition
An event is a custom piece of information about something your user does. You can create an event for virtually any action the user can do. Have in mind this means that there are no pre-configured events in the User.com app - you have to create them yourself. Every event is assigned to a user who triggers it and it's visible on his or her timeline. For example, "user clicked the buy now button" or "user filled out a form".
Events can also have their own attributes - additional pieces of information that bring more details. They are sent along with the event. For example for the "Purchase summary" event you can send "Price", "Discount code" and "Delivery option" attributes.
Once you've sent the data to User.com, you can filter users based on these events - allowing you, for example, to send personalized messages to a specific group of people that have performed a given activity.
Moreover, each event has a timestamp what allows you filter out when exactly a specific action was done by a user.
How to Create Events
There are five main ways to create Events:
Send them via GTM, more about it here.
Send them with the Javascript, more about it here.
Send them via REST API, more about it here
Send them via the Automations, using the "Create Event" module, more about it here
Send them via Data collectors, more about it here
NOTE! Due to the fact that events can include various attributes of different types we highly recommend to define the event along with the attributes in the application first and send the data only after it (otherwise all attributes will become "string" ones, what will affect the filtering options).
So, please go to the Settings > App Settings > User data & Events > Events section and click on "Create event" button.
You need to come up with the name and the description of the event (we highly recommend to stick to the same naming style in all fields to simplify future application usage).

Once you are ready with the event itself, you can click on the gear icon in front of the event and choose "Edit attributes" option.
On an event attributes view choose the "Add event attribute" and define the attribute's name and type.
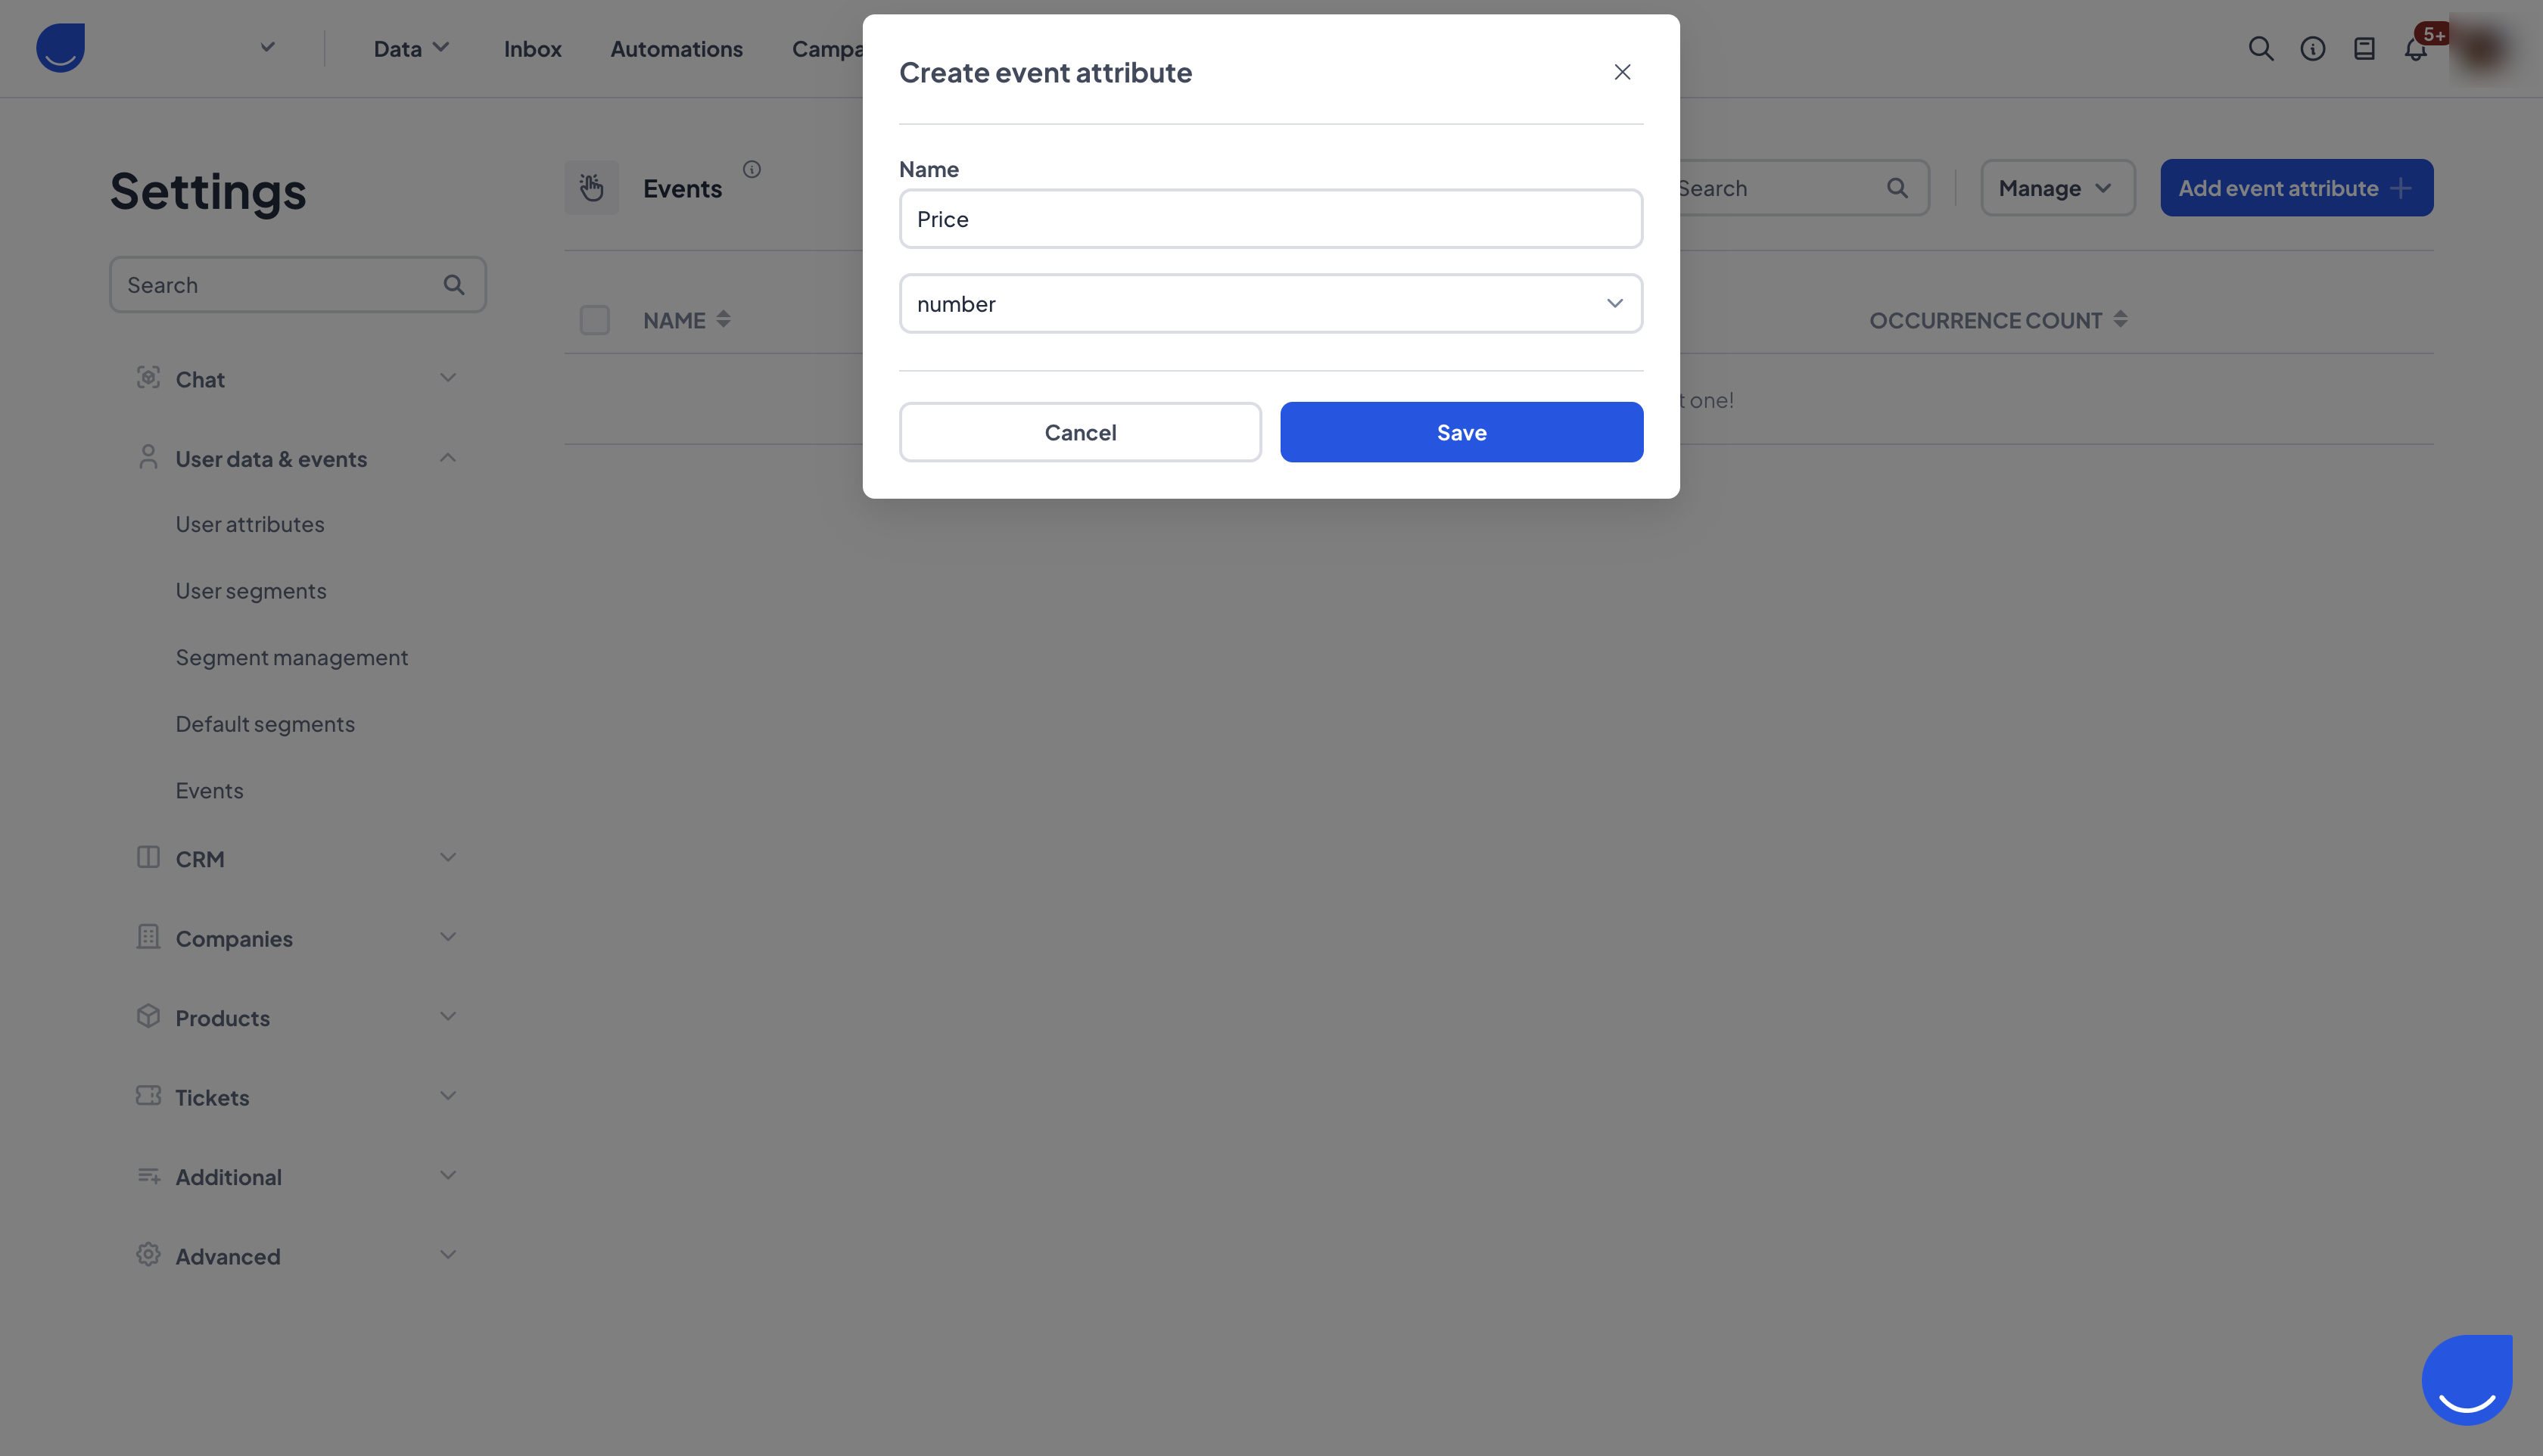
Congrats! Now you can add more attribute to complete you event.
Below you can find all possible attribute types with the descriptions and examples.

NOTE! It's very important to choose a proper attribute type, as later on you will not be able to change it.
Use Cases
Events give you flexibility. You can set them to trigger at any user action, and they can be used in many different ways.
Send events by email
Email your users with products they have added to their carts but have not yet purchased. You can even include product attributes such as image or price tag.
Trigger an automation
There is a module in the automations called "Event Trigger". Because events can be generated by an infinite number of user actions, they give you total flexibility as to when you want to trigger your automation.
Filter users
Find your eCommerce or SaaS big spenders. With event information about their purchases, you can, for example, find users who have bought more than five products or have spent more than a certain amount in a single payment. Use the filters in the People Section for it.
Get statistics
Keep track of statistics on your events. You can create a data dashboard that contains information about the number of products you have sold in the last 24 hours.