Users import via CSV
Find out how you can import contacts from a CSV file.
We understand that if you already have your own database, you don't want to lose it after installing user.com. You can import your data to user.com via CSV file. This article will provide you with tips on how you can do that.
Before you start
In user.com there are standard and custom attributes. If your columns correspond with standard attributes, you do not need to do anything. If you want to import additional information, you will need to create custom attributes. For details, please go here: Custom attributes. Make sure, that each column has a correct attribute value. If you want to import Scoring, make sure your attribute is an integer. If you want to import Date, set attribute as datetime, etc.
Prepare your CSV file:
You must have a unique value for each contact. It can be either an email address or a user ID. You can have several users with the same email address but with different user IDs.
Mind the data format; the default is UTF-8.
Always include column headings. Column headings should be the same as attributes' names.
If you are exporting a CSV file from Excel, make sure there are no cells left out.
If you are exporting from Excel, make sure that you set the correct data formats for each cell.
If you have multiple options in one column, please use "|" between them. They will be imported as separate values. It's mostly useful when importing tags.
Let's begin!
Go to Settings -> Importers and click the box Import users.

Prepare your CSV file.
You can either drag&drop the file or use the CSV button to upload it.
You can specify Tags that you want to add to the uploaded users.
You can also add users to a list if you want.
Choose the Separator that was used in your CSV.

Connect each Header (column 1)from the CSV file with an existing Attribute (column 2).
To match unmatched columns, choose the correct one from the drop-down menu and click Add.

Once all the columns from your file are matched with attributes, click Import. Then the import process will begin.
Important:
- if you use user_id in user.com and import CSV with existing users with the same user_id > users in the system will be updated
- if you don't use user_id in user.com and import CSV with existing users without any user_id > users in the system will be updated
- if you use user_id in user.com and import CSV with existing users without user_id > new users will be added
- if you don't use user_id in user.com and import CSV with existing users with user_id > new users will be added
Updating user data with a CSV file
To update existing users you need to follow the same steps as above.
Remember: to update users' attributes you need to have the same email address.
For example:
You want to update John Smith, United States, john@smith.com. John moved to Canada, so we want to update that with John Smith, Canada, john@smith.com.
Assign users to companies during import
There are a few steps you need to follow before importing your user list.
1. You need to have all companies already created in your User.com app.
2. All companies need to have their attribute, Company ID, filled in.
If you're filling out your database of companies using import, include company IDs in your CSV file. And after clicking Import, link the proper column with the attribute Company ID.

3. After import, you should be able to see imported companies along with their IDs in the section Data -> Companies.

4. Now it's time to import the user list.
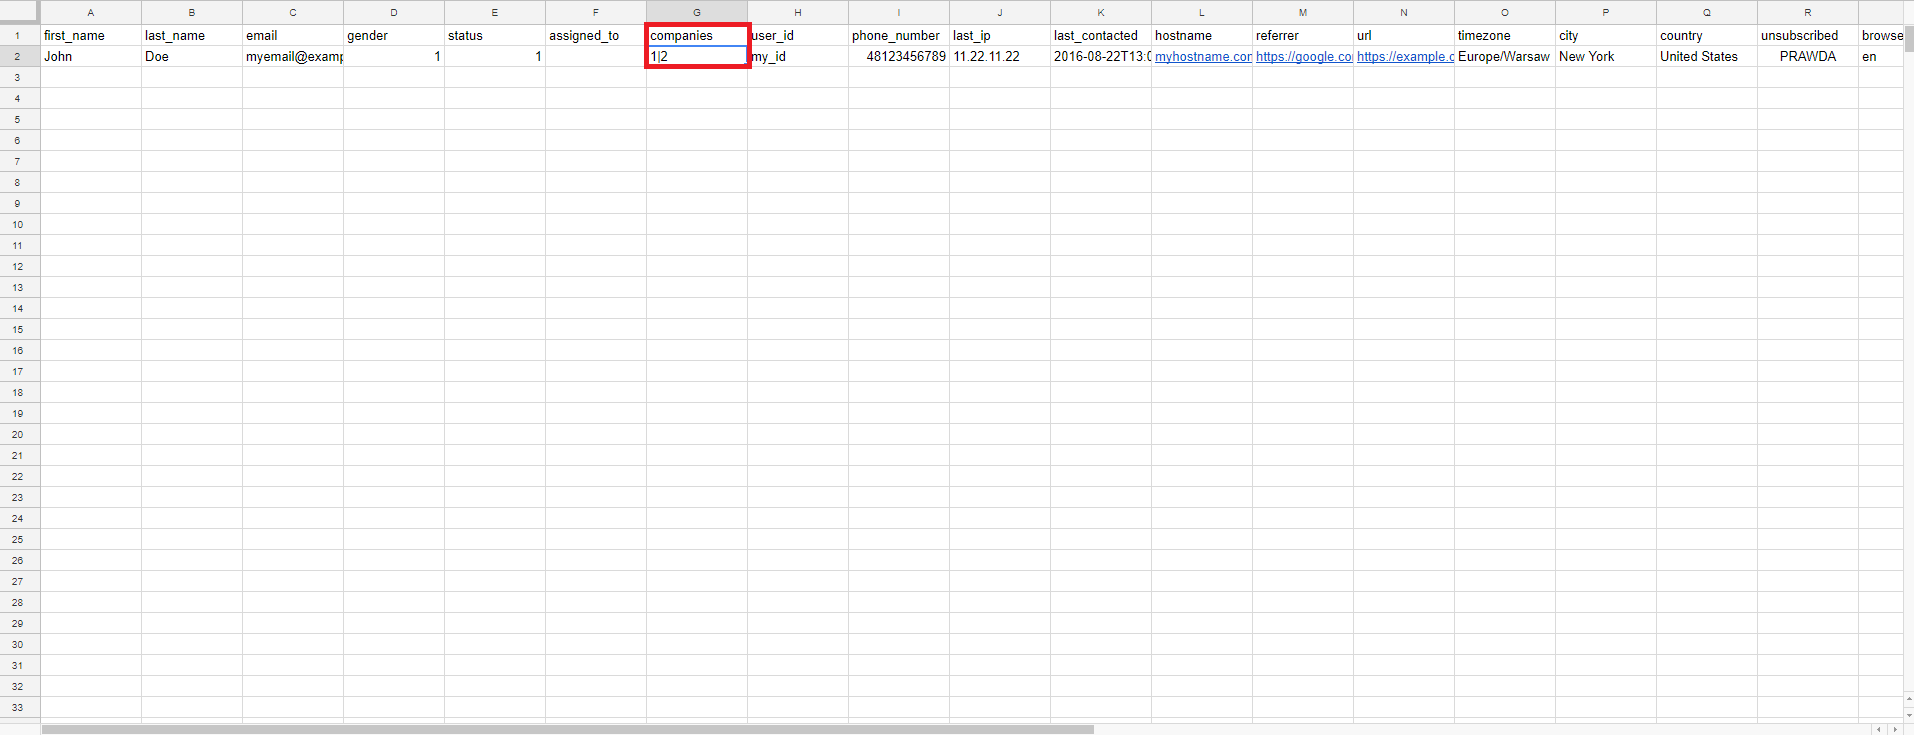
You can download our exemplary CSV file and fill it out with your users. Then find the column Companies column and fill it in with the proper company IDs used in the previous steps. If you want a particular user to be added as an employee in two or more companies, separate their IDs with "|" as on the screenshot below:

After you upload your CSV and click Import, you will need to link columns with their proper attributes. If you used our exemplary CSV file, they will be linked automatically. In this case, it's crucial to link the column filled in with company IDs with the company id attribute.

Click Import and go to the section, People, to see the results. You should see that imported users have been assigned to companies.

Furthermore, in the section, Companies, you'll see that your companies have the column, Employees, filled in with imported users.

