Web push prompt configuration

To start sending the we push campaigns you need to display the prompt first
All web push campaigns start from prompt configuration.
What is the web push prompt?
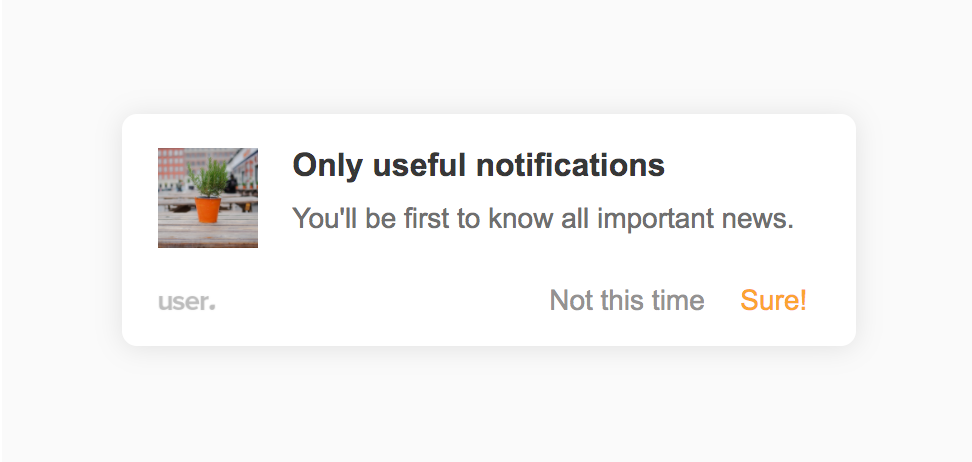
It's the first message that appear to all visitors on your website where they can allow or deny receiving further web push messages from you.
So this is a pop-up message that give the subscription option.
Only the users who agree on the web push there will receiver the next messages.
How to configure the web push prompt?
First you need to enter the Campaigns > Web push section.
Here we can see that the whole configuration includes 5 steps. So, let's click on "Setup prompt" and go through them. This will be our step 1 :)

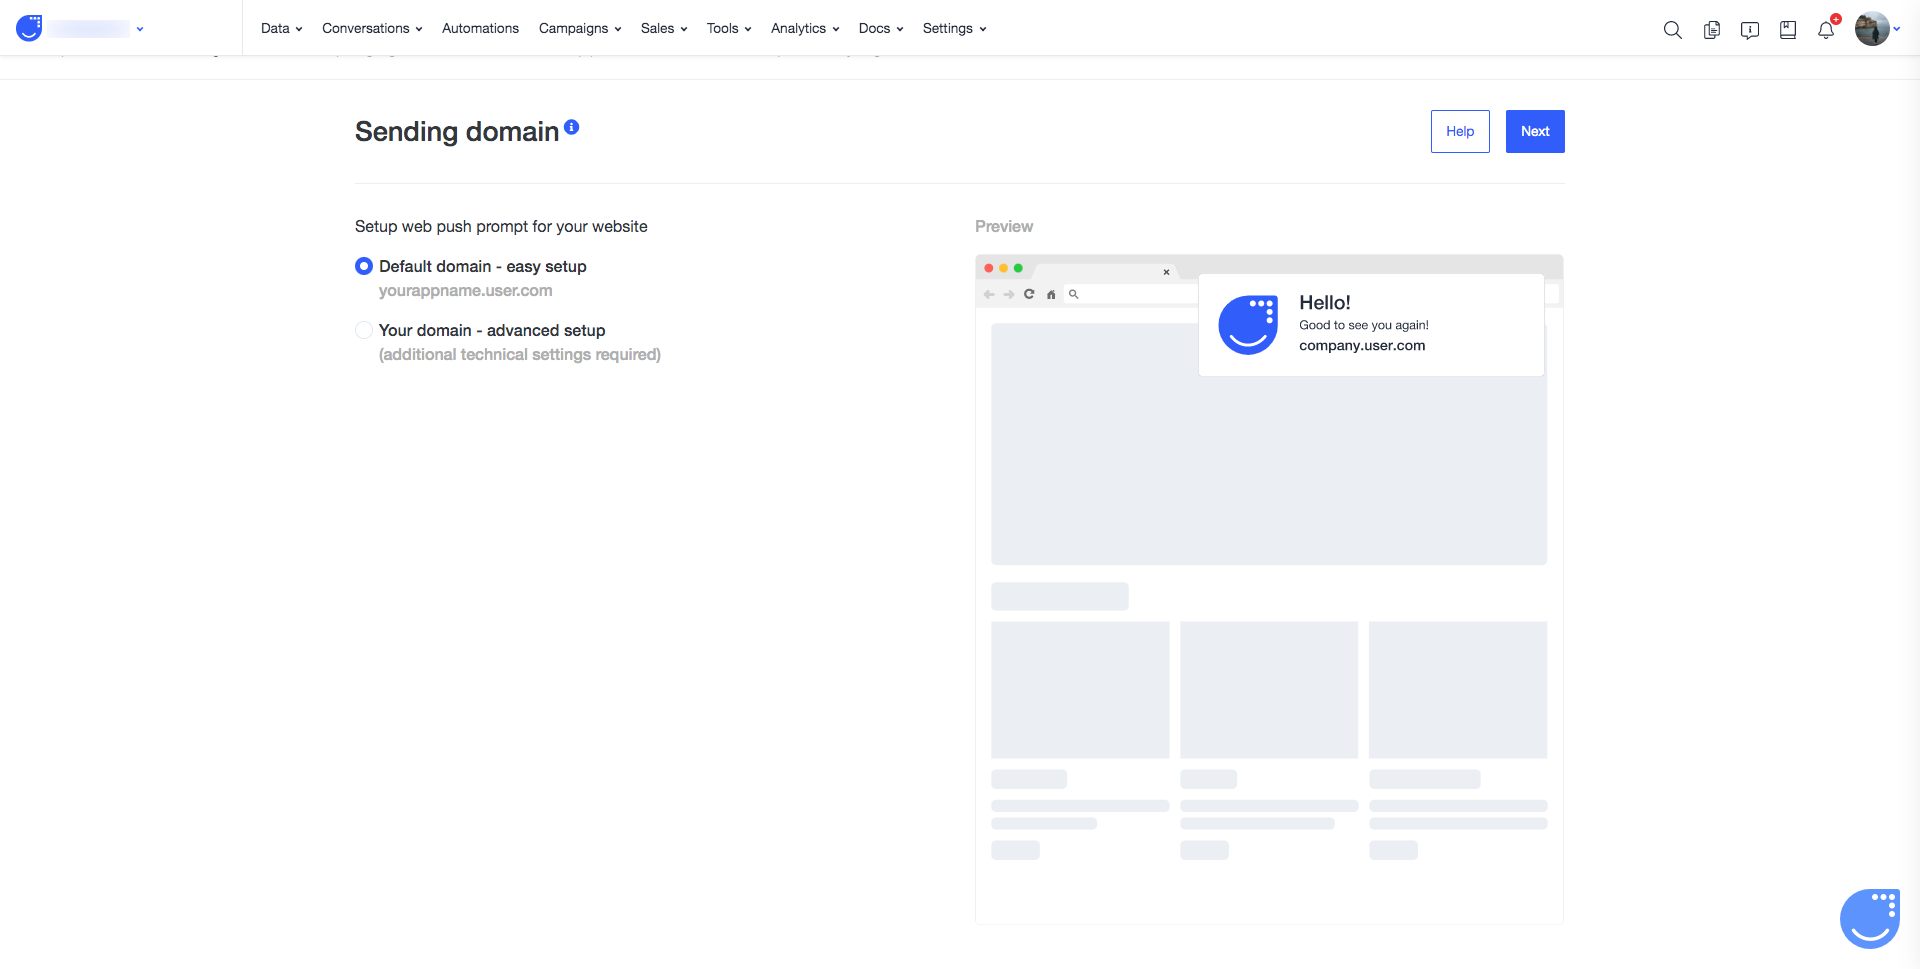
Step 2: Select sending domain
Here you can decide whether you want your web push notifications to appear under default domain or your own one.
Default domain - just set up the campaign and you are ready to send. It doesn't require any additional configurations from outside the app. Your notifications will be sent from yourappname.user.com domain.
Own domain - If you want to send web push notifications from your own domain, you can do it if you use either HTTPS or HTTP protocol. Nonetheless, you will need to upload to your website a few extra lines of code for the feature to be active. This step will be described later.
If you wish to use your own domain, we strongly suggest using HTTPS, as browsers may block notifications from domains using the HTTP protocol. You can get your SSL certificate for free here.
Own domain configuration
Download the file shown on the page. Here it is.

Add the file to the root of your website using FTP or any other method; the URL to this file will be https://yourdomain.com/ue_sw.js.
Check if the User.com widget prompts you to subscribe to web push notifications.
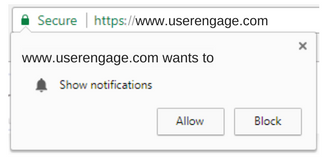
In HTTPS, your visitors will encounter a two-step (double opt-in) subscription process.
If the visitor clicks Subscribe, they are shown a second window sent by their browser to validate the subscription. (You can’t customize this pop-up). This is where the actual subscription takes place. Below is an example from Google Chrome.
Using multiple domains
The "Use multiple domains" option allows you to set and enable a web push prompt for multiple domains. Enable it if needed:
Step 3: Setup language and craft content
Here comes the content of the web push prompt.
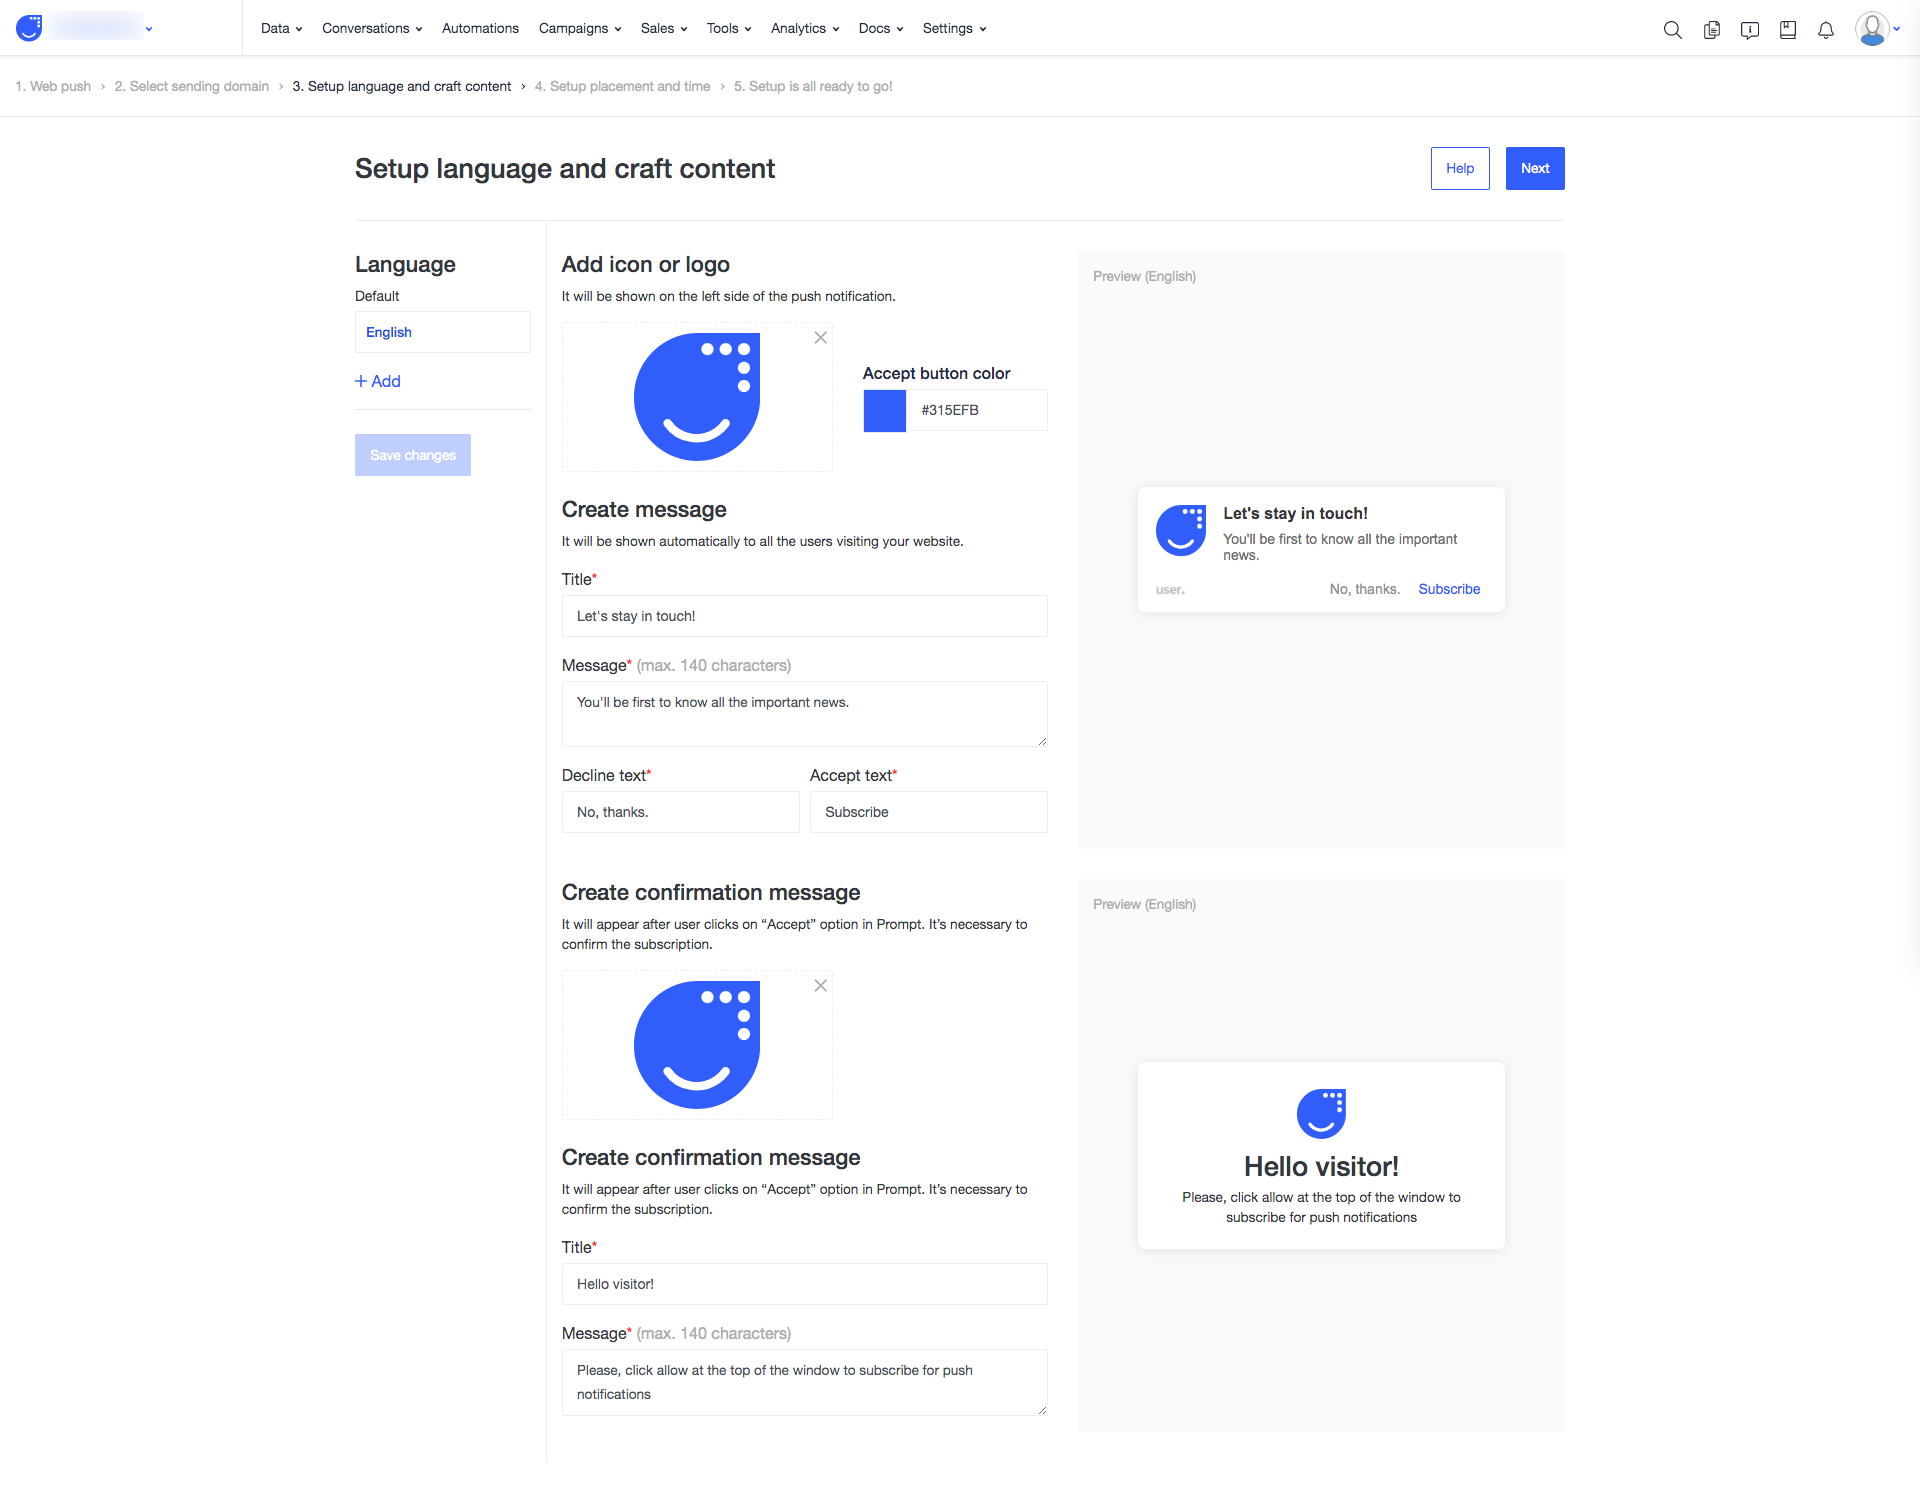
What we can configure here:
Add icon or logo: it's important for each brand to be recognizable. So, please, upload your company logo or the icon to be shown to your visitors.
Create a message: at this point you decide what text will be engaging the users to subscribe to your web push communication.
Create confirmation message: this is double opt-in step where the user should conform the subscription. So, please, fill the content for these fields as well.
Language: you can define various language versions for your web push prompt. They will appear on the basis of the browser language of the user. As well you can choose the default language that will be show in situations where you do not have a translation for a specific language.
You have the preview on the right side of the page to monitor all the changes and how they look like.
If you selected the "Custom domain" option in the first step, you will only be able to set up a prompt design without the confirmation message.
When using multiple custom domains, you need to type each of them in the top right corner and click "Add a new domain":
Remember to skip "http://", "https://", and "www." For example, for the domain "https://www.user.com", you should add just "user.com".
When you add all your domains, you will be able to change the prompt settings for each of them separately.
Step 4: Setup placement and time
Now we go to the configurations of the placement and time of appearance of the web push prompt.
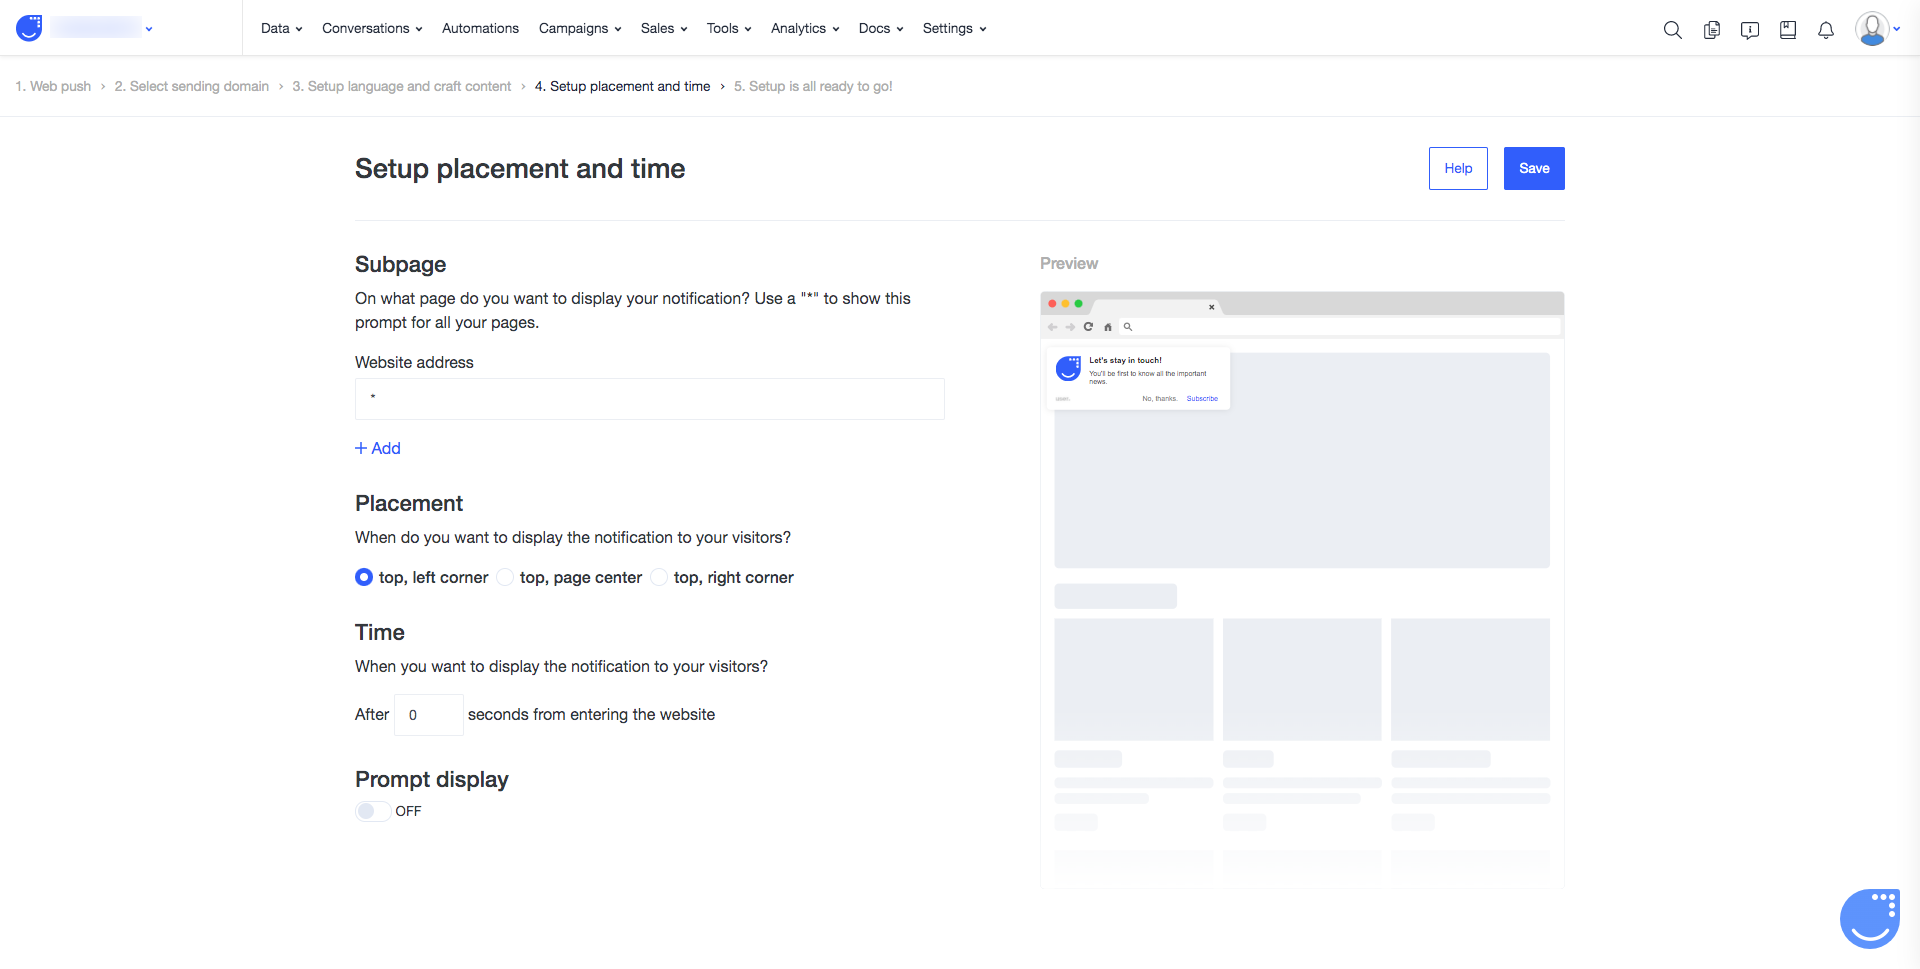
Here you need to pay attention on:
Subpage: here you can decide if the web push prompt should appear on every page of your website or only on specific ones. You can add more than 1 url here.
Placement: the web push prompt can be shown in the top right or left corner of the page or on a central part.
Time: set the time delay between the moment user enters the page and the moment the web push prompt should appear.
Prompt display: the final point! This toggle defines if the web push prompt should start be shown on your website or not.
Step 5: Setup is all ready to go!
Congratulations, you have finished the setup of your web push prompt. Now your users can subscribe and later in you will be able to send the web push notifications to them on the basis of their characteristics and activity on the website.
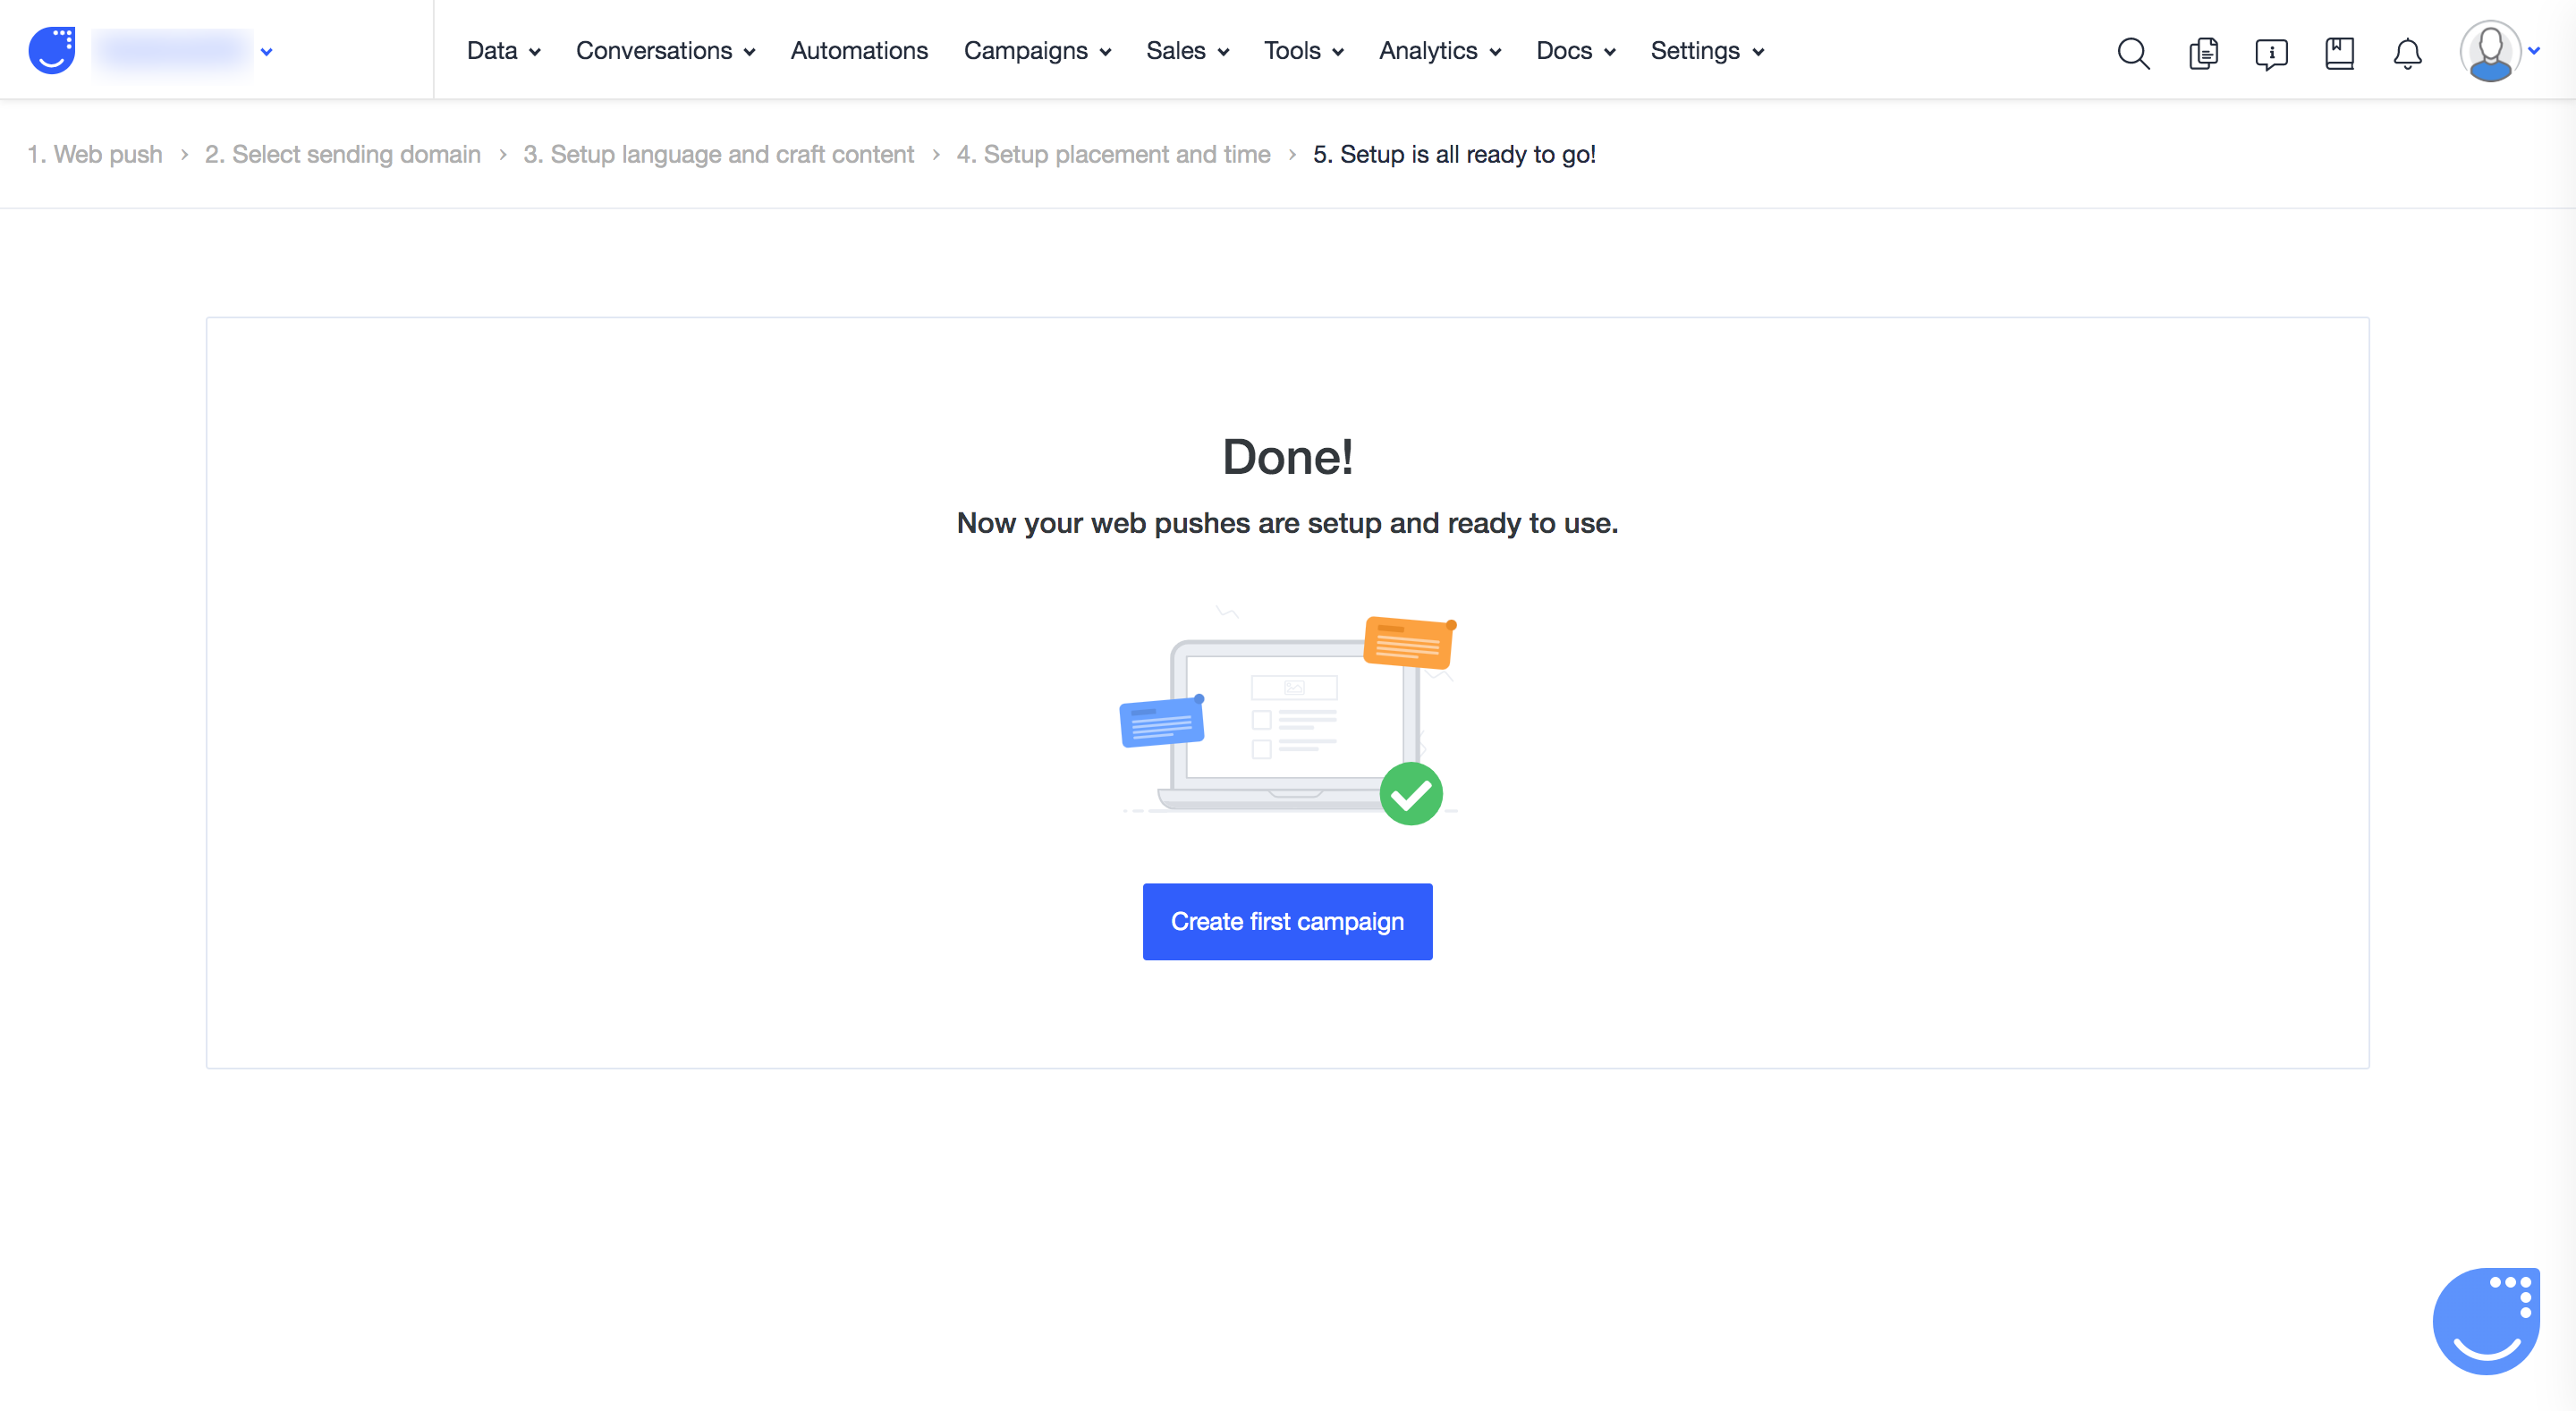
On the final step you can find the button to create your first web push campaign straight away!
Remember that personalized communication targeted on right time is the best way to engage your users and make them your happy customers.